Introduction
Rigid boxes are synonymous with luxury packaging. From premium electronics to high-end cosmetics, rigid boxes elevate brand value while ensuring product safety. Unlike folding cartons, rigid boxes are made from sturdy paperboard and don’t collapse, giving a premium unboxing experience. As consumer expectations shift toward sustainability and design-centric packaging, rigid boxes remain the packaging of choice for top brands. In this blog, we break down the step-by-step process of manufacturing rigid boxes and explore the precision, craftsmanship, and automation involved in bringing them to life.
Understanding Rigid Box Manufacturing
Rigid box production is a detailed process that blends manual skills with industrial automation. It begins with raw materials and progresses through cutting, pasting, wrapping, and finishing. Each stage demands accuracy to maintain the premium quality that rigid boxes represent.
Let’s walk through the entire production process, from material selection to final inspection.
Step 1: Material Selection
The first step in rigid box production is selecting the right materials. The core component is greyboard (also called chipboard), which forms the skeleton of the box. This board ranges from 800 to 2000 GSM, depending on the product’s weight and packaging needs.
For wrapping, coated paper or specialty paper is chosen. Brands often opt for textured, metallic, or embossed paper to differentiate themselves. Selecting sustainable materials is also becoming a growing priority for manufacturers and consumers alike.
Step 2: Die Cutting the Greyboard
Once the greyboard is selected, it’s die-cut to precise dimensions using an automated die-cutting machine. The quality of this cut directly impacts the structure of the final box. For a secure and seamless look, V-grooves or creasing lines are applied to enable clean folding at corners.
Precision at this stage is critical. Any error can cause misalignment, which affects not only appearance but also functionality.
Step 3: Pasting and Assembly of Greyboard
The die-cut greyboard pieces are folded along the crease lines and assembled into a box shape. Hot-melt glue or cold glue is applied to the flaps to ensure a strong bond. In high-volume production, this is done with automatic pasting machines, while luxury handmade boxes may be assembled manually.
Assembling the box properly ensures structural integrity, making it ready for the next stage.
Step 4: Preparing the Wrapping Paper
Wrapping paper is as important as the core itself. It conveys the brand’s image and differentiates the product on shelves. The selected paper is first printed (if required), then laminated or UV-coated for durability.
Next, it’s die-cut to match the box dimensions. Die-cutting of wrapping material also includes angular cuts at the corners to allow for seamless folding. The margins are carefully measured to ensure they wrap around the edges without bulking or tearing.
Step 5: Gluing the Wrapping Material
The glue application process is vital to achieving a clean, bubble-free finish. Using automated gluing stations, adhesive is evenly applied to the back of the wrapping paper. For small batches or bespoke boxes, manual pasting is still preferred due to its flexibility and detailing control.
The glued wrap is then mounted onto the box shell. It is folded tightly along the edges and corners for a snug fit.
Step 6: Wrapping and Finishing
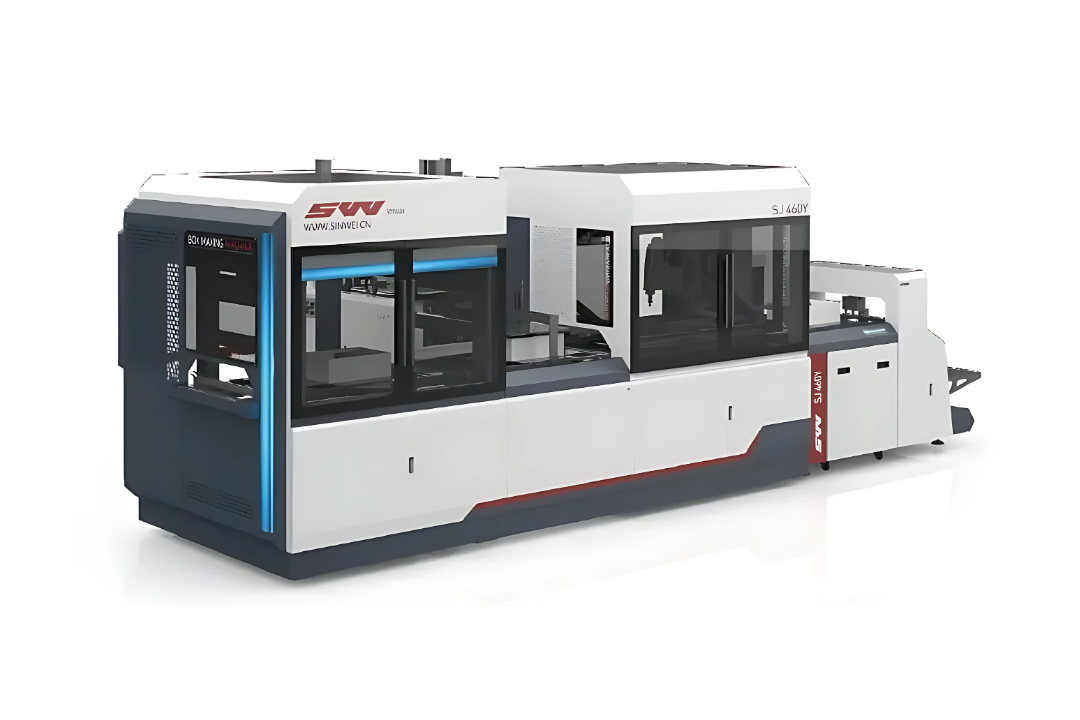
At this point, the box goes through the wrapping process, where the greyboard structure is enclosed in the printed paper. Automated rigid box wrapping machines ensure high-speed, accurate wrapping with corner pressing for a crisp finish.
Once wrapped, boxes may go through edge folding machines to ensure all sides are firmly sealed. The quality of wrapping defines the premium look and feel that customers expect from rigid box packaging.
Step 7: Additional Customizations
Brands often seek visual appeal and tactile experiences through custom finishes, which may include:
- Foil stamping for metallic logos
- Embossing or debossing for texture
- Spot UV for glossy highlights
- Magnet or ribbon closures for added luxury
These enhancements are applied post-wrapping and play a crucial role in branding and consumer interaction.
Step 8: Quality Check and Inspection
Every rigid box must undergo a stringent quality control process. Checks include:
- Alignment accuracy
- Adhesive bonding strength
- Surface smoothness
- Wrapping consistency
- Structural durability
Boxes with flaws like air bubbles, tears, or misalignment are rejected. High-end production lines often use optical inspection systems to automate this process, reducing human error.
Step 9: Packing and Delivery
Once approved, rigid boxes are packed securely—often using partitioned cartons to prevent damage during transit. Many manufacturers also provide flat-pack options with foldable designs for space-efficient shipping, though this feature is limited to certain rigid box styles.
Proper labeling and protective wrapping ensure that the premium packaging reaches the client in perfect condition.
Conclusion
Rigid box production is a blend of engineering, design, and craftsmanship. From selecting the right materials to applying custom finishes, each step is critical in delivering a high-end product that reflects a brand’s identity and ensures customer satisfaction. As brands continue to invest in luxury packaging, understanding this manufacturing process helps businesses make informed decisions when partnering with packaging providers.
Robus India leads the way in offering high-quality, customizable rigid box solutions tailored to your brand needs. With cutting-edge automation and skilled craftsmanship, we ensure every box we produce speaks volumes about the product it holds.
